
CRA 사용하기
프로젝트 생성을 원하는 경로 밑에서
npx create-react-app [프로젝트 이름] --template typescript

// npx create-react-app corgiApp --template typescript (예시)
이 작업을 통해 CRA가 typescript를 이용할 때 필요한 기본적인 것들을 설치 및 설정을 해준다.
( babel, webpack etc... )
설정이 궁금하거나 수정하고 싶다면
npm run eject (yarn eject)를 실행하면 되며
돌이킬 수 없음을 경고하고 'y'를 눌러주면 config, scripts 폴더가 생기면서 설정파일들이 보여지게 된다.
( 원래는 존재하지 않음 )
tsconfig 설정
tsconfig.json이 기본으로 설정이 되어있다. 이것을 조금만 바꿔서 아래와 같이 수정한다.
{
  "compilerOptions": {
    "target": "es6",
    "lib": [
      "dom",
      "dom.iterable",
      "esnext"
    ],
    "baseUrl": "./src",
    "allowJs": true,
    "skipLibCheck": true,
    "esModuleInterop": true,
    "allowSyntheticDefaultImports": true,
    "strict": true,
    "forceConsistentCasingInFileNames": true,
    "noFallthroughCasesInSwitch": true,
    "module": "esnext",
    "moduleResolution": "node",
    "resolveJsonModule": true,
    "isolatedModules": true,
    "noEmit": true,
    "jsx": "react-jsx",
  },
    "include": ["src"],
    "exclude": ["node_modules"]
}설명
{
  "compilerOptions": {
    "target": "es6", // 트랜스파일할 자바스크립트 버전.
    "lib": ["es5", "es6", "es7", "es8", "esnext"], // 몇 버전까지의 JS를 사용할지 작성.
    "allowJs": true, // JS파일들 TS에서 import해서 쓸 수 있게 해줌.
    "skipLibCheck": true, // 선언파일의 형식 검사를 스킵. -> 정확성은 떨어지지만 그만큼 시간을 절약.
    "esModuleInterop": true, // export default가 없는 라이브러리도 * as없이 import 가능.
    "strict": true, // 엄격모드. false하면 타입스크립트 쓰는 의미없음.
    "strictNullChecks": true, // null도 엄격모드에 포함할건지.
    "forceConsistentCasingInFileNames": true, // 파일의 상태가 다르면 다르게 구분짓게 도와줌.
    "module": "esnext", // 어떤 import 문법을 적용할건지.
    "moduleResolution": "node", // import가 무엇을 참조하는지 확인.
    "resolveJsonModule": true, // 정적으로 json가져오기.
    "jsx": "react-jsx" // tsx파일을 어떻게 jsx파일로 변환할 건지 결정.
  },
  "include": ["src"], // 컴파일대상 포함.
  "exclude": ["node_modules"] // 컴파일대상 제외.
}절대경로 지정
- (추가) "baseUrl": "./src"
변경 전 (상대 경로)
import Header from '../../../components/Header'변경 후 (절대 경로)
import Header from 'components/Header'eslint 설정
eslint는 Javascript 코드의 문제점들을 수정할 때 유용한 util tool이다.
VS Code extension으로 eslint를 설치한다.
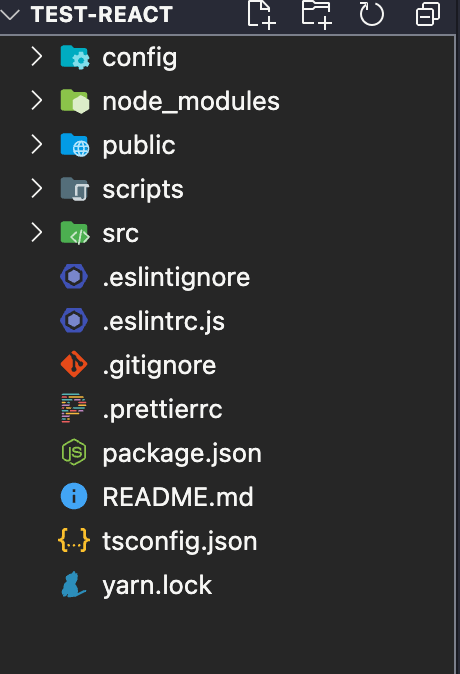
설치 완료 후, 프로젝트 root에 '.eslintrc.js', '.eslintignore'를 만든다.
.eslintrc.js에 아래 코드를 넣는다.( eslint를 어떤 plugin으로 어떤 rule로 적용할 것인지 정하는 파일 )
( eslint를 어떤 plugin으로 어떤 rule로 적용할 것인지 정하는 파일 )
// .eslintrc.js
module.exports = {
  root: true,
  env: {
    browser: true,
    node: true,
  },
  extends: [
    'eslint:recommended',
    'plugin:@typescript-eslint/eslint-recommended',
    'plugin:@typescript-eslint/recommended',
  ],
  plugins: ['prettier', '@typescript-eslint'],
  rules: {
    'prettier/prettier': [
      'error',
      {
        singleQuote: true,
        semi: true,
        useTabs: false,
        tabWidth: 2,
        printWidth: 80,
        bracketSpacing: true,
        arrowParens: 'avoid',
      },
    ],
  },
  parserOptions: {
    parser: '@typescript-eslint/parser',
  },
};
.eslintignore에 아래 코드를 넣는다.( eslint 적용을 받지 않게 할 파일 및 폴더 )
node_modules
dist
VS Code 플러그인 설정
window -> "ctrl + shift + p"
mac -> "cmd + shift + p"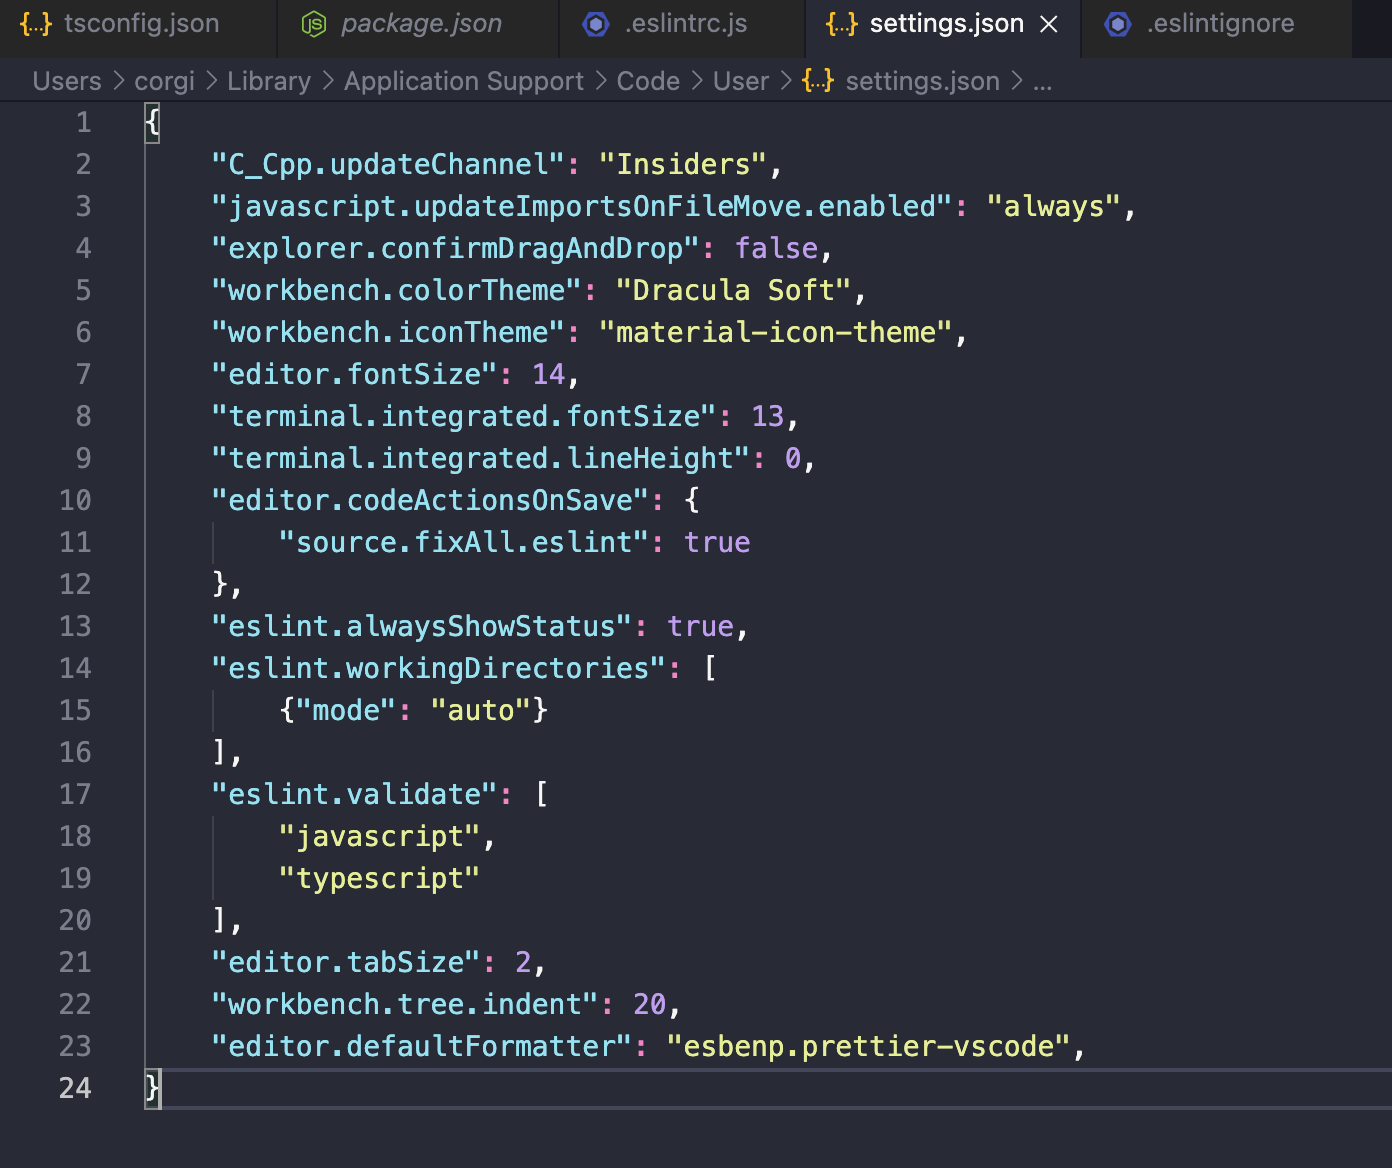
키로 명령어 실행창을 띄우고 'open settings (json)' 을 입력하고 선택한다.settings.json 파일의 내용을 유지한 상태로 마지막 부분에 아래 내용을 추가
"editor.codeActionsOnSave": {
      "source.fixAll.eslint": true
  },
  "eslint.alwaysShowStatus": true,
  "eslint.workingDirectories": [
      {"mode": "auto"}
  ],
  "eslint.validate": [
      "javascript",
      "typescript"
  ],
추가하면 아래와 같이 된다. ( 개인마다 설정이 다르기 때문에 다르게 보일 수는 있음! )
prettier 설정
prettier는 code formatter이다.
-> 파일의 수정내용을 저장할 때마다 자동으로 format을 맞춰 줌
-> 다수와의 협업에서 동일한 방식의 format으로 파일을 맞춰주기에 혼동을 줄여줌
- prettier extension 설치
- 프로젝트에 prettier 및 plugin 설치
npm install -D prettier eslint-config-prettier eslint-plugin-prettier - 프로젝트 root에 '.prettierrc' 파일 생성 및 설정root에 .prettierrc 를 생성하고 아래와 같이 설정한다
{
  "singleQuote": true,
  "parser": "typescript",
  "semi": true,
  "useTabs": false,
  "tabWidth": 2,
  "printWidth": 120,
  "arrowParens": "always"
}
모든 옵션들은 다음과 같다.
{
  "arrowParens": "avoid", // 화살표 함수 괄호 사용 방식
  "bracketSpacing": false, // 객체 리터럴에서 괄호에 공백 삽입 여부
  "endOfLine": "auto", // EoF 방식, OS별로 처리 방식이 다름
  "htmlWhitespaceSensitivity": "css", // HTML 공백 감도 설정
  "jsxBracketSameLine": false, // JSX의 마지막 `>`를 다음 줄로 내릴지 여부
  "jsxSingleQuote": false, // JSX에 singe 쿼테이션 사용 여부
  "printWidth": 80, //  줄 바꿈 할 폭 길이
  "proseWrap": "preserve", // markdown 텍스트의 줄바꿈 방식 (v1.8.2)
  "quoteProps": "as-needed" // 객체 속성에 쿼테이션 적용 방식
  "semi": true, // 세미콜론 사용 여부
  "singleQuote": true, // single 쿼테이션 사용 여부
  "tabWidth": 2, // 탭 너비
  "trailingComma": "all", // 여러 줄을 사용할 때, 후행 콤마 사용 방식
  "useTabs": false, // 탭 사용 여부
  "vueIndentScriptAndStyle": true, // Vue 파일의 script와 style 태그의 들여쓰기 여부 (v1.19.0)
  "parser": '', // 사용할 parser를 지정, 자동으로 지정됨
  "filepath": '', // parser를 유추할 수 있는 파일을 지정
  "rangeStart": 0, // 포맷팅을 부분 적용할 파일의 시작 라인 지정
  "rangeEnd": Infinity, // 포맷팅 부분 적용할 파일의 끝 라인 지정,
  "requirePragma": false, // 파일 상단에 미리 정의된 주석을 작성하고 Pragma로 포맷팅 사용 여부 지정 (v1.8.0)
  "insertPragma": false, // 미리 정의된 @format marker의 사용 여부 (v1.8.0)
  "overrides": [
    {
      "files": "*.json",
      "options": {
        "printWidth": 200
      }
    }
  ], // 특정 파일별로 옵션을 다르게 지정함, ESLint 방식 사용
}
- VS Code default formatter 변경
VS Code 환경설정에 들어가서 default라고 치고
Editor: Default Formatter 부분을 'esbenp.prettier-vscode'로 변경해주면 완료!
라이브러리 TypeScript 세팅
필요한 라이브러리도 TypeScript 세팅해 준다.
npm i --save react react-dom typescript
npm i --save-dev @types/react @types/react-dom @types/node
참고자료
https://velog.io/@miiunii/CRACreate-React-App으로-Typescript-설정하기
CRA(Create-React-App)으로 Typescript 설정하기
모든 설정은 기본적으로 Node.js(NPM)과 CRA가 갖춰진 상태라고 가정하고 시작한다.IDE는 VS Code 기준이다프로젝트 생성을 원하는 경로 밑에서 이 작업을 통해 CRA가 typescript를 이용할 때 필요한 기본
velog.io
https://velog.io/@originxh/TypeScript-tsconfig.json%EC%84%A4%EC%A0%95
TypeScript - tsconfig.json설정
타입스크립트를 설치하고 나면 tsconfig.json파일을 생성하고 세부설정을 해야합니다. 옵션은 자신이 하고싶은거에 따라 더 추가할수도, 없앨수도 있습니다.
velog.io
[React] CRA(create-react-app) + TypeScript 세팅하기
이제는 React 프로젝트에 TypeScript를 적용하지 않은 케이스를 만나는 게 어려운 시대가 되었다. 프로젝트 생성할 때마다 매번 공식 문서를 확인하고 검색하는 나 자신을 위해서 기록용으로 소소하
bolob.tistory.com
https://nomadyoung-agency.tistory.com/30
TypeScript 프로젝트에서 절대경로 설정하기
프로젝트 개발을 하다 보면 여기저기서 서로 다른 경로의 파일들을 불러와야 할 때가 많다. 변경 전 (상대 경로) import Header from '../../../components/Header' depth가 깊어지면 깊어질수록 ../../../ 많아져
nomadyoung-agency.tistory.com
컴파일 옵션 CompilerOptions
typeRoots, types ◽ 타이핑이 안 되어 있는 자바스크립트 라이브러리를 사용할 때 타입을 지정해주는 옵션 ◽ 이전에는 타입스크립트가 아닌 서드파티에서 제공해주고 있었음 -> typescript 2.0이상 지
siot0.tistory.com
'project' 카테고리의 다른 글
| 왜 next.js인가? (1) | 2023.11.19 |
|---|---|
| S3, CloudFront, Route53을 이용해서 정적 웹 호스팅하기 (1) | 2023.11.12 |
| react-hook-form과 yup을 이용한 로그인 구현 (0) | 2023.10.29 |
| docker (0) | 2023.09.19 |
| 협업때 자주 쓰이는 git 명령어 정리 (0) | 2023.09.07 |